AX Healing Krait Mk II Build

An Elite Dangerous ship build that heals shielded “tank” ships when fighting Thargoid interceptors in wings or teams.

This arrangement is similar to how MMORPGs structure groups. The “tanks”, usually Imperial Cutters or Federal Corvettes with Prismatic Shields, try to draw the interceptor’s fire by staying close, hot and dishing out damage. Healers try to keep the tanks’ shields up, particularly when hit by an interceptor’s lightning attack. Dedicated anti-swarm and anti-scout ships handle the thargon swarms and scouts. The rest try to draw damage using more traditional anti-xeno builds and tactics.

This post assumes you are familiar with Thargoid interceptor combat.

Goals

Create a ship to:

  1. Heal tanks’ shields. This requires the Regenerative Sequence experimental effect on Beam Lasers.
  2. Remove the caustic debuff from tanks. This requires a Decontamination Limpet Controller and a Cargo Rack for limpets.
  3. Reach tanks. Beam lasers and limpets are only effective within a kilometre or so. This build needs the speed and agility to reach them.
  4. Survive around hostile thargoids, including thargon swarms and scouts. This requires strong shields, strong hull and removing your own caustic debuff.

Build

Krait Mk II blueprint by CMDR-Arithon (https://swat-portal.com/forum/gallery/image/9624-krait-mk-ii/)

Link: EDSY (have it open as you read about the build for easy reference)

Healing is a fun way to contribute while giving a different set of challenges. Elite Dangerous rarely creates opportunities for different roles within a team. A healer’s focus is on enabling others to be more effective.

Other ships, notably the Anaconda, can provide more raw healing power because they have more hard points and a larger power distributor. However, the Krait Mk II is faster and more agile, helping you get to more mobile tanks when needed or be more forgiving when you are out of position.

Healing:

  1. Healing Beams: Efficient Beam Lasers with the Regeneration Sequence experimental effect are the best way to regenerate allies’ shields. The Regeneration Sequence experimental effect restores a team- or wingmate’s shields instead of damaging them. Efficient means you can fire the lasers for as long as possible, healing to heal through an interceptor’s lightning attack. The Concordant Sequence experimental effect increases the regeneration rate of the shield for ten seconds. However, the buff does not stack and tanks’ prismatic shields often have a slow regeneration rate.
  2. Fixed Weapons: Tanks are usually large, slow-moving targets. Fixed weapons give enough extra damage/healing to make them worth it.
  3. Power Distributor: An interceptor’s lightning attack will drain a tank’s shield quickly, particularly if it temporarily disables the tank’s Power Distributor. A Weapon Focused Power Distributor, four pips weapons and a full capacitor allow you to keep restoring the shields for 30+ seconds.
  4. Decontamination: A Decontamination Limpet Controller and copious Cargo Racks for limpets means you can help remove the caustic debuff from tanks or, if attention permits, other allies. However, this can be challenging. Scouts, thargon swarms and interceptors often shoot off attached limpets. Limpets are also slow, and even a slow Federal Corvette can outrun a limpet. Cooperation with the tank is required. In a pinch, decon limpets can repair hull, including your own.
  5. Tagging: Remember to shoot the interceptor a few times for a second. Otherwise, you will not get any combat bonds when it dies.

Defence

  1. Shields: Many AX pilots prefer to go shieldless. However, given nearby tanks should be keeping the interceptor’s attention and scouts, thargon swarms or other interceptors may be nearby, strong shields soak up most of the damage that should be coming this ship’s way. If the shield drops, consider a reboot/repair to quickly restore it to 50%.
  2. Caustic Sink Launcher: Given the difficulty of heating up with a shield and Efficient Beam Lasers along with the prominence of caustic clouds and missiles, a Caustic Sink Launcher helps keep the healer focused on the tank’s health and not its own.
  3. Absolute Damage: Guardians do absolute damage so maximize raw shield and hull strength where possible.
  4. No Guardian Modules: A Glaive’s anti-guardian module field will not worry this build.
  5. No Shutdown Field Neutralizer: Most tanks have a Shutdown Field Neutralizer that will protect you. If not, swap one of the Shield Boosters for it.

Tactics

  1. Team structure: Ensure you are in a wing or team with the tanks. Otherwise, your Regeneration Sequence Beam Lasers will damage their shields, not heal them. It also helps you easily locate your tanks by looking at the blue points on your radar.
  2. Positioning: Keep the tanks within one kilometre and between the interceptor and you. Beam Lasers are most effective within 800 m. This position also reduces the chance the interceptor will target you.
  3. Pip management: The default choice is two pips in systems and four in weapons. You will occasionally need to put pips into engines to boost away from caustic missiles or catch up to a distant tank.
  4. Anti-Interceptor Shield: If your team is struggling against an interceptor, firing five beam weapons against its shield will bring it down quickly. However, this will bring you in range of its lightning attack and will put you on its target list for caustic missiles. Target the shield with care.
  5. Anti-scout: Destroying scouts is challenging but surprisingly doable if you can get up close. It can keep you occupied while waiting for interceptors to jump in.

Dolphin On-Foot Support Build

An Elite Dangerous ship build.

Goals

Like the Cobra Mk III On-Foot Support Build, this ship build’s goals are:

  1. Get the commander to/from on-foot missions introduced with Odyssey. This requirement includes transporting an SRV (for mission support or raw material gathering) and a Detailed Surface Scanner (for finding points of interest).
  2. Endure a sustained assault from on-foot enemies. This requirement ensures you can complete mission goals rather than rushing back to defend your ship.
  3. Land at every surface settlement, outpost or station, effectively requiring a small ship. 
  4. Provide fire support to kill scavengers and other ground enemies. As these are too small to target with most ship-mounted weapons, this effectively means missiles or mines.
  5. Have a fast boost speed. The build should reach supercruise distance quickly for material farming or escaping hostile ships.
  6. Have a reasonable jump range and a Fuel Scoop for travelling to on-foot engineers or distant missions.

Build

Dolphin Blueprint by CMDR-Arithon (https://swat-portal.com/forum/gallery/image/9486-dolphin/)

Link: EDSY (have it open as you read for easy reference)

When I first approached the problem of getting my commander to on-foot missions, the Cobra Mk III seemed to be the perfect choice. I still had the one I used early in my commander’s career. Its versatility and repurposing a ship I loved made it an attractive choice.

However, I recently unlocked all the on-foot engineers on a second or alternate (alt) account. I took it as an opportunity to try different things, including different ships. The Dolphin proved to be surprisingly effective at this role compared to my Cobra Mk III On-Foot Support build:

FeatureCobra Mk IIIDolphinComment
Jump Range30.58 LY33.93 LY
Pitch/Roll/Yaw (seconds for a complete turn)3.4/1.2/124.0/1.1/5.3Dolphin has better yaw, making flying more natural and attacking ground targets easier.
Boost605 m/s591 m/s
Raw Shield Strength625 MJ681 MJ
Hull Strength6651001
Fuel Scoop Size45Faster fuel scooping.
Thrusting Heat40%31%Easier fuel scooping.
Comparison of Cobra Mk III and Dolphin builds

Where the Cobra Mk III was superior, it was not relevant. For example, the Dolphin has only two small hard points compared to the Cobra’s two medium and two small. However, the Dolphin’s two small hard points have better convergence, making hitting small ground targets like on-foot scavengers easier. The Dolphin’s lower ammunition capacity is rarely a constraint.

The Dolphin has more flexibility and utility. The Dolphin’s extra utility slot frees up internal module slots that the Cobra Mk III needs for Guardian Shield Reinforcement Packages. The Dolphin could even use a size five Prismatic Shield Generator, although this makes power management challenging.

The only real difference is aesthetics. Some people dislike the Dolphin’s more organic shape and the wheezing sound of its boost. The Cobra Mk III looks and sounds more like an Elite Dangerous ship should.

Defence:

  1. Prismatic Shields and Overchanged Power Plant: Most of the defensive measures are the same as with the Cobra Mk III. Strong prismatic shields protect it when attacked by scavengers or pirates. The Power Plant is Overcharged so it can service the power-hungry shields.
  2. Strong Hull: Unlike the Cobra Mk III, this ship can afford strong hull protection. It has the internal slots for Hull and Module Reinforcement Packages. Its size five Thrusters can maintain a fast speed with the extra weight.

Offence:

  1. Ground Attack: The Advanced Missile Racks provide explosive area damage against on-foot scavengers or guards. The Dolphin’s hard points are close, making targeting easier, and the fast yaw means moving sideways faster to change targets or to dodge incoming projectiles.

Utility:

  1. Double SRV bay: This can transport both a Scarab and a Scorpion or two of your favourite kind of SRV. Dropping down to a 2G does not give any significant advantage. Coupled with the Cargo Rack, you could use this build for surface missions.
  2. Advanced Docking Computer: Odyssey added the ability to auto-land on planet surfaces. This module allows easy landing when distracted or on uneven terrain near surface points of interest.

Solo Tactics

  1. Flee: This build runs, not fights. Its prismatic shields protect it long enough for it to escape. This build will outrun almost everything with its almost 600+ m/s boost speed. Most enemies will mass lock this build, so the high speed is welcome.
  2. Power (pip) management: Place four pips in systems and two in engines when landing to maximize shield protection. Otherwise, do the reverse to maximize boost frequency, speed and agility.

Wing or Team Tactics

  1. Pairing: This build can transport two commanders to and from an on-foot mission location, providing each with an SRV.
  2. Rescue: This build can rescue an on-foot commander who has lost their ship or would otherwise wait for an Apex. Use missiles to kill any ground targets, land to pick up the commander, and then boost to supercruise before enemy ships take down the shields.

PvE Combat Vulture Build

An Elite Dangerous ship build for more experienced players, effectively an end-game version of the Beginner PvE Combat Vulture Build.

Goals

The goals are:

  1. Create a build that uses the Vulture effectively for late-game PvE combat, such as Hazadous Resource Extraction Sites, High Intensity Conflict Zones and Threat 7 Pirate Activity signal sources.
  2. Use any module or engineering in the game to maximize effectiveness and the Vulture’s strengths.

Build

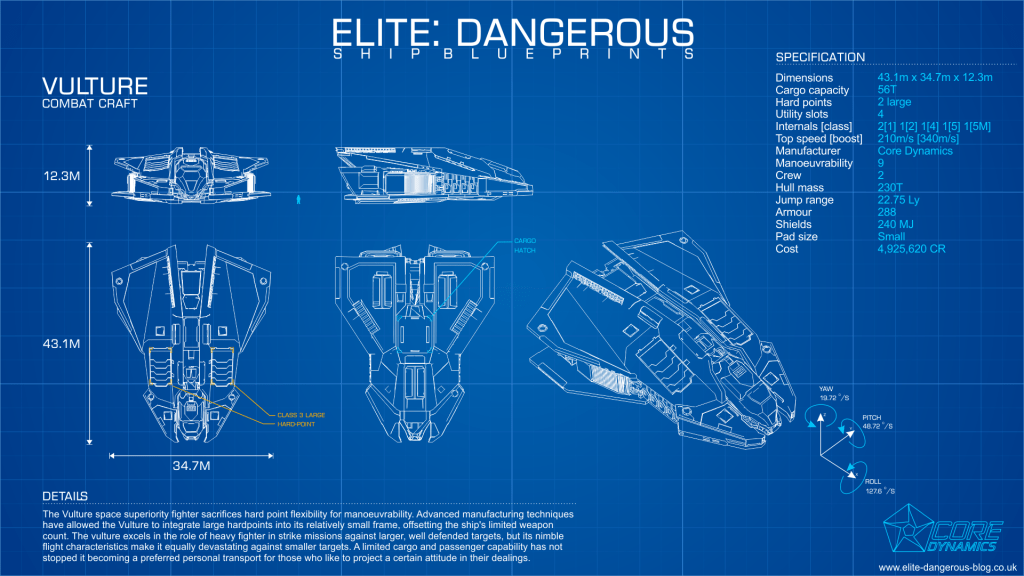
Vulture Blueprint by CMDR-Arithon (https://swat-portal.com/forum/gallery/image/9464-vulture/)

Links: EDSY (have it open as you read the guide for easy reference)

As mentioned in my Beginner PvE Combat Vulture Build, the Vulture is a wonderful small ship to learn PvE combat. It is cheap, packs oversized weapons and teaches good skills like pip (power) management.

However, the Vulture is rarely seen during end-game combat. Large ships like the Federal Corvette and medium ones like the Fer-de-Lance and Chieftain tend to dominate. They have more firepower, better hull and shields, speed and/or agility.

No clever engineering or obscure modules will change this balance. However, the Vulture is far from useless. Some even see its disadvantages as a challenge. Killing NPC pirates in a fully engineered Federal Corvette is relatively easy. Doing so in a Vulture requires more skill.

Offence:

  1. Intertial Impact: The Internal Impact experimental effect changes the damage from 100% thermal to 50% thermal and kinetic. This change means the Burst Lasers become effective against both shields and hull. However, it adds a 3% jitter, which is much larger than it sounds.
  2. Efficient: Some people use the Short Range Blaser blueprint to maximize damage output but this drains the distributor quickly. Using Efficient means you can fire indefinitely with four pips to weapons.
  3. Fixed: A small, nimble ship is the perfect platform for fixed weapons. The extra damage over gimballed weapons helps, as does the immunity to chaff or even needing to select your target.
  4. FSD Interdictor: An FSD Interdictor is useful for interdicting assassination mission targets, wanted ships for bounty vouchers or even powerplay ships for merits. Swap for another Guardian Module or Hull Reinforcement Package otherwise.

Defence:

  1. Resistance: This build focuses on high resistances for shields instead of raw strength. Unless you consistently fight plasma-armed enemies and cannot dodge the slow-moving projectiles, this focus gives a high effective strength with fast regeneration.
  2. Fast Charge versus Lo-Draw: Like most ships using Fast Charge on a Bi-Weave Shield Generator, the Power Distributor cannot supply enough power with two pips in systems to rebuild the ship at the optimal rate. This build’s shields should drop rarely but, if they go down often, replace the Fast Charge experimental effect on the shield generator with Lo-Draw.
  3. Reactive Surface Composite and Thermal Resistance: Reactive Surface Composite inverts the standard resistances for armour, making it strong against kinetic and explosive weapons but weak against thermal. To compensate, the build uses Thermal Resistant on one of the Hull Reinforcement Packages. This gives the build net positive resistances on the hull.
  4. Guardian Shield and Module Reinforcements: Guardian Module Reinforcement Packages provide slightly more protection than Module Reinforcement Packages but cost some power. Swap for normal Module Reinforcement Packages if you do not have them unlocked. The Guardian Shield Reinforcement Package is the only non-utility module that buffs a shield.

Variations

  1. Shieldless: A shieldless version (EDSY) reduces longevity but lets you put the system pips into engines for greater speed and agility. Consider it a challenge. Replace the Shield Generator and Shield Reinforcement Module with Guardian Module Reinforcement Packages and a Hull Reinforcement Package respectively. Replace the Shield Boosters with Shielded Point Defence and Chaff Launchers. Replace the Efficient blueprint on the Burst Lasers with Sturdy, giving them more protection and higher armour penetration. Sturdy costs more power but you have power to spare, even with an Armoured Thermal Spread Power Plant.
  2. Anti-Thargoid Scout or Hunter: To create an AX version (EDSY), take the shieldless version and replace the burst lasers with Azimuth Enhanced AX Multi-Cannons. Fill the utility slots with Caustic Sink Luanchers and an Enhanced Xeno Scanner. Replace the FSD Interdictor with a 1A AMFU and the Guardian Module Reinforcement Packages with normal Module Reinforcement Packages to reduce power use and prevent a Glaive field from damaging them. Replace the Reactive Surface Composite with Military Grade Composite, because the additional resistances are unnecessary. Once again, other ships fulfil this role better but this build can hold its own.

Tactics

  1. Finding targets: This build works best against wing-less large or less agile targets. Anacondas, Asps, Pythons and Type-10s are generally easy prey. Using fixed and jittery weapons against fast or agile targets, like Elite Vultures and Vipers, is doable but frustrating.
  2. Point blank: Get as close as possible to enemy ships, preferably above or below where their surface area is maximized. Avoid jousting as it reduces time on target. Instead, circle strafe, pre-turn and landing gear-turn to track ships as they pass by. Hold down fire. Even with only two pips to weapons, exhausting the distributor or overheating will take minutes.
  3. Power (pip) management: Two pips in systems and four in weapons are usually sufficient. Temporarily shift pips into engines to boost or run down fleeing ships. Ironically, power management is easier in this build than in the beginner version. An Overcharged Monstered Power Plant gives more than enough power. A Charge Enhanced Power Distributor gets it to where it needs to be.

Beginner Anti-Xeno (AX) Krait Mk II

An Elite Dangerous ship platform supporting multiple builds aimed at those new to Thargoid combat.

A detailed explanation of Thargoids and Thargoid combat is beyond the scope of this post. The Anti-Xeno Initiative (AXI) wiki has the best documentation about them, tactics, and ship builds.

Goals

Create a ship to:

  1. Perform one or more roles when fighting Thargoid Interceptors, Thargon Swarms and Thargoid Scouts, such as those found in AX Conflict Zones.
  2. Be self-sufficient, including removing the damage over time debuff from caustic missiles and neutralizing Thargoid shutdown fields. This means the ship can be viable solo or in random groups.
  3. Require no unlockable modules, reputation or rank. This makes it easier to build for newer players.
  4. Outrun and outmaneuver most thargoid interceptors, scouts and caustic missiles. This is unlikely to include the Basilisk interceptor, whose maximum speed is 530 m/s, but should include all others.
  5. Land on a medium-sized pad. This ensures it can land at all outposts and stations, including ones under active Thargoid attack. Medium-sized ships’ purchase and rebuy prices are also generally lower than large-sized ships.

Build

Krait Mk II blueprint by CMDR-Arithon (https://swat-portal.com/forum/gallery/image/9624-krait-mk-ii/)

The new large gimballed Enhanced AX Multi-Cannon is the best AX weapon that does not require unlocking. This replaces the turreted version. Unfortunately, the limit of four AX weapons still applies. The Python and Krait Mk II both have three large hardpoints, the most for a medium ship, but the Krait Mk II is faster and more agile, making it the best medium-size AX ship for new commanders.

That said, many ships make viable anti-xeno or anti-thargoid builds. For example, the Alliance Chieftain is also effective but more so against interceptors than scouts. It is more manoeuvrable but has less hull integrity and shields.

These builds are also guidelines. Feel free to experiment but note this build’s goals and motivations.

While you can run AX builds without engineering, Thargoids are intentionally difficult opponents. Unengineered ships are harder to use. Having to repair frequently may leave your team without a needed role. Unlocking engineers and grinding for materials is time-consuming but worth it. You do not need to max out the engineering to be viable, grade 3 or 4 is sufficient, but more engineering means an easier fight.

General:

  1. Maximize Hull: All thargoid damage is phasing, meaning a portion bypasses shields. All thargoid damage is Caustic, meaning traditional resistances like thermal, kinetic and explosive are useless. The damage over time debuff from caustic missiles directly damages hull irrespective of shields. Therefore, while shields help, maximizing hull integrity is imperative to survivability.
  2. Caustic Debuff: Being hit by caustic missiles or entering a destroyed scout or interceptor’s cloud will put a caustic debuff on the ship. Either use a decontamination limpet or overheat to at least 120% to eliminate it. Use the AFMU during downtime to repair malfunctioning modules.
  3. Thargoid Shutdown Field: Interceptors create a pulse that temporarily shuts down ships when (1) they enter the instance or (2) on their last heart. Use the Shutdown Field Neutralizer to prevent you and nearby allies from being shut down.
  4. Finding Targets: AX Conflict Zones tend to spawn scouts at long ranges. Interceptors can travel far away from the centre of a conflict zone during combat. Therefore, A-rated sensors help find scouts or interceptors at extended ranges. AX builds focusing on Non Human SIgnal Sources can operate well with D-rated.
  5. Lo-Draw Shield: The shield has Lo-Draw rather than Fast Charge. Fast Charge draws too much power if the shields ever drop, meaning there will be no power for the Shutdown Field Neutralizer or Decontamination Limpet Controller. However, Lo-Draw slightly decreases the recharge rate.
  6. Speed and Agility: While not as fast as a Basilisk interceptor, this build can outrun other Thargoids, including caustic missiles.

Anti-Scout

Build: Coriolis (Coriolis does not support the enhanced AX multi-cannons yet, so those slots are shown as turretted) or EDSY. Have your preferred one open as you read the guide for easy reference.

You can purchase the Enhanced AX Multi-Cannons from any Sirius megaship.

  1. Weapons: Three large and one medium Enhanced AX Multi-Cannons form the foundation for scout killing. The enhanced versions have a high shot speed. The gimbal allows limited auto-aiming, minimizing missing due to scouts’ manoeuvrability. The Long Range beam laser helps “tag” scouts and interceptors at long range. The Thermal Vent experimental effect reduces heat when striking a target or increases it when missing, helping to burn off the caustic debuff.
  2. Setup: Assign the multi-cannons and laser to the primary fire button and the decontamination to the secondary fire button in the same fire group. Assign a key to the Shutdown Field Neutralizer. This build’s Power Plant and Power Distributor are more than sufficient, meaning pip micro-management is optional.
  3. Target Selection: Engage regenerators first (because these heal nearby scouts), berserkers (because they buff nearby scouts and cause them to fire caustic missiles), inciters (because they buff nearby scouts) and then marauders last. The Xeno Scanner identifies scouts and their health.
  4. Engaging: Engage scouts at a range of one to two kilometres. This is within the AX multi-cannon minimum range but not close enough for scouts’ agility to make them hard to target.
  5. Swarms and Interceptors: Get a hit or “tag” on an interceptor to share in the bonds for killing it but avoid them if you are dealing with scouts. For interceptors, ensure someone in the wing gets a scan so you can target hearts effectively. Avoid using AX multi-cannons against shields, which may trigger the interceptor’s caustic missiles.

Mixed Anti-Swarm and Anti-Scout

As Anti-Scout, above, but replace two of the Enhanced AX Multi-Cannons with Remote Release Flak Launchers. Put the Remote Release Flak Launchers in side hardpoints to maximize the area covered by exploding flak.

  1. Setup: Put the Remote Release Flak Launchers in one fire button, the Enhanced AX Mutli-Cannons and Laser in another and the Decontamination Limpet Controller in another in a separate fire group.
  2. Scanning: Using the Xeno Scanner identifies the interceptor type and allows targeting of exerted hearts for you and everyone in your team. Once you get used to visually identifying interceptors and their hearts, you can replace the Xeno Scanner with another shield booster.
  3. Target Selection: Thargon swarms are your priority because only Remote Release Flak Launchers can meaningfully damage them. Prioritize swarms attacking other team members or, failing that, larger swarms first. Otherwise, prioritise scouts as mentioned above, particularly those attacking team members.
  4. Interceptors: Get a hit or “tag” on an interceptor to share in the bonds but prioritize other targets. While scouts are a nuisance, a single hit can destroy a needed attached limpet or stop an ammunition synthesis.

Anti-Interceptor

As Anti-Scout, above, but equip four 2B Guardian Gauss Cannons (or the salvation versions) and one 2D Long Range Beam Laser with Thermal Vent. Unfortunately, Guardian Gauss Cannons require unlocking.

Once you get familiar with interceptor combat, experiment with other Guardian weapons. However, Guardian Gauss Cannons are the most effective against Thargoid interceptor hearts.

  1. Setup: Placing all four Guardian Gauss Cannons on a single fire button and the Beam Laser on the other. While Guardian Gauss Cannons can fire frequently, they will spike your heat. Use the Beam Laser liberally to minimize heat but be careful not to exhaust the weapon capacitor. Avoid using gauss and other weapons against Thargoid shields, because it may trigger the firing of caustic missiles.
  2. Alternate Setup: Put two adjacent Guardian Gauss Cannons and the Beam Laser in one fire button and the other two Guardian Gauss Cannons and the Beam Laser in the other fire button. This reduces the heat impact of firing all four gauss cannons at once. Grouping the gauss canons into smaller groups with good convergence can make heart sniping easier. Hold the fire button to keep the laser firing to reduce heat.
  3. Range: Guardian Gass Cannons are most effective at the 1 to 1.5 kilometre range. The cannons still do maximum damage, the angular motion of interceptors is minimized and the slight auto-aim feature of fixed weapons is most effective.
  4. Engaging: Stay at least one kilometre from the interceptor unless you use the Xeno Scanner. This helps your Gauss Cannon accuracy, keeps you out of range of the lighting attack and helps any dedicated tanks keep the interceptor’s focus. Also, avoid using Gauss Cannons on shields. They are not very effective and can trigger an interceptor’s caustic missiles.
  5. Scouts: Leave scouts for those with AX Multi-Cannons. Targeting scouts with fixed weapons is harder than against the larger, slower interceptors and gauss cannon ammunition is limited.

Variants

  1. Unlockable modules: Replace the Module Reinforcement Package with the Guardian version to increase module protection. The double-engineered 5A Frame Shift Drive purchased from a Human Technology broker will slightly increase jump range. Replace the 4E Cargo Rack with the corrosive-resistant version if you want to scoop up hearts.
  2. Shieldless: I do not recommend running this build shield-less unless you focus on interceptors. Cold orbiting does not work against scouts or Thargon swarms. Missiling Thargons will quickly disable or destroy hardpoints without a shield. However, to do so, replace the 6C Bi-Weave Shield Generator with a 5D Module Reinforcement Package and the two 0A Shield Boosters with Heat Sink Launchers with Ammo Capacity, preferably the double-engineered versions.

Passenger Rescue or Evacuation Anaconda Build

An Elite Dangerous ship build for evacuating passengers in bulk from damaged stations (before the events of Update 14) or stations in Thargoid Invasion systems (after Update 14).

Goals

Create a ship to:

  1. Carry as many passengers as possible. Evacuating passengers are happy with economy class.
  2. Make the 150+ LY trip to a rescue ship as quickly as possible. This means maximizing the jump distance and range to do the trip without refuelling. Failing that, outfitting a fuel scoop.
  3. Escape a Thargoid hyperdiction or interdiction. This means both the protection and speed to escape.
  4. (Optional) Collect engineering materials and commodities floating inside or around burning stations. Alternatively, transport critically injured evacuees in escape pods.

Build

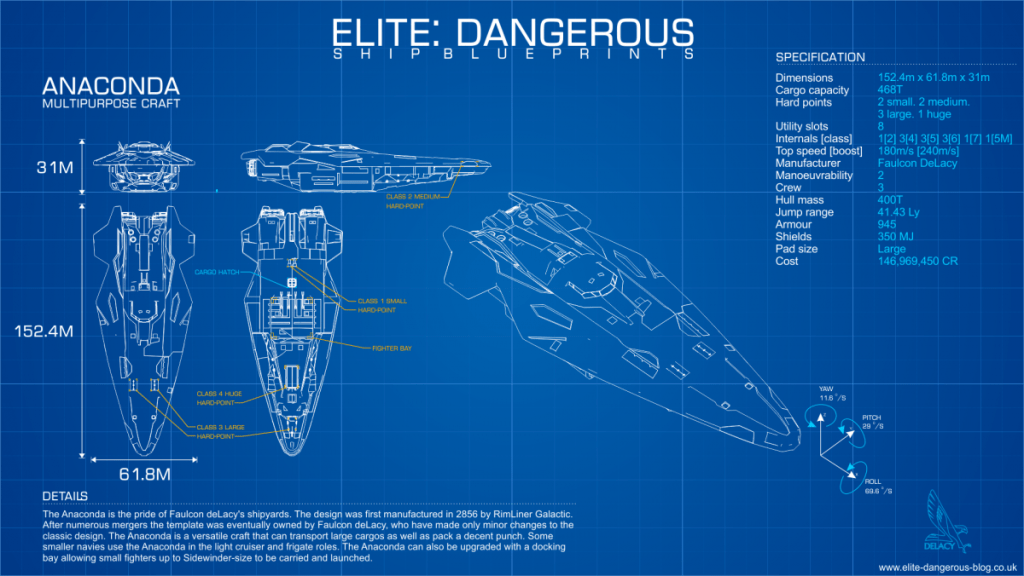
Anaconda Blueprint by CMDR-Arithon (https://swat-portal.com/forum/gallery/image/9472-anaconda/)

Links: EDSY and Coriolis (have your preferred one open as you read the guide for easy reference)

A comparison of large ship economy passenger capacity is given below.

Ship23456+Smallest Shield Slot SizeTotal Economy Passengers (Shielded)Total Economy Passengers (Shieldless)
Type-9 Heavy122145154170
Beluga Liner041245168184
Type-10 Defender122136106138
Anaconda103344194202
Federal Corvette012255196212
Imperial Cutter011255188204
Large Ship Economy Passenger Capacity

Given the largest passenger cabin is size 6, the Federal Corvette carries the most passengers in economy class cabins. However, the Anaconda is the second best when shielded and has almost a ten light year longer jump range with a similar build. The Imperial Cutter has a similarly crimped jump range, although its speed makes escaping mass locks easier. Therefore, the Anaconda is the best all-round choice.

Passengers and cargo:

  1. Passengers: Running passengers is straightforward. I prefer missions that reward engineering materials, especially ones with fewer passengers for five class five materials. The autodocking computer helps when repeatedly docking.
  2. Cargo: A small cargo rack and limpet controller can help collect floating engineering materials and commodities in damaged stations. You can pause inside a burning station, activate collector limpets and then use heat sinks to control your heat. Otherwise, it can help carry critically injured evacuees in escape pods from transport missions.
  3. Jumping: This build uses the double-engineered 6A Frame Shift Drive for maximum range. If you lack one, use Increased Range with Mass Manager. The 4A Fuel Scoop is small but sufficient. The build’s low heat means you can throttle to zero at the edge of a star’s exclusion zone without overheating.

Defence:

  1. Shields: While Thargoid damage is phasing, a Prismatic Shield Generator provides the best protection. Substitute for a regular Shield Generator if you do not have access to Prismatic Shields. It, with Shield Boosters, provides enough protection to survive several Thargoid encounters assuming you repair regularly.
  2. Armour: Favour speed over hull integrity with Lightweight Alloys, given the Anaconda already has a tough, strong hull.
  3. Speed and agility: While an Anaconda will never be able to outrun a Basilisk, maximizing the Dirty with Drag Drives engineering on the Thrusters minimizes the time in danger during Thargoid encounters. The Power Distributor engineering ensures it can boost every five seconds with four pips to engines and two to shields.
  4. Cold: Given the Anaconda’s massive size 8 power plant and minimal power requirements, engineering to minimize heat is appropriate. This reduces Thargoid weapon accuracy and makes fuel scooping easier.
  5. No weapons: This build runs from fights.

Variations

  1. Longer jump range: Replace the Cargo Rack with a Guardian FSD Booster. This reduces the jumps required to reach rescue ships.
  2. More passengers: Replace the Cargo Rack and Collector Limpet Controller with more economy-class passenger cabins for a small increase in passenger capacity. Remove the shields if you are happy to take some hull damage during Thargoid encounters.
  3. Anti-Scout: Equip several turreted enhanced AX multi-cannons in the large and huge hardpoints. Bring the fight to any scouts that interdict you or that attack you around stations! This variation can be fun but removing caustic damage from missiles is difficult. This build’s engineering makes overheating slow.

Tactics

  1. Surviving interdictions: Submit to interdictions, put four pips into engines, then boost every repeatedly. Scouts will be a pest until the FSD cools down. Basilisks will mass lock you, preventing you from low waking, but take up to 30 seconds to commence pursuit. That should be long enough to get the required five km to escape their mass lock. Use heat sinks liberally to keep your heat low and minimize thargoid accuracy.
  2. Surviving hyperdictions: Hyperdictions, even from Basilisks, are easier to survive than interdictions because their mass lock does not block high wakes. Boost, fire heat sinks, then high wake as soon as possible. Use the Shutdown Field Neutralizer when you get a message about the impending shutdown field.
  3. Run: This build runs from fights, notwithstanding the anti-scout variation above.

Laser Mining Type-9 Heavy Build

An Elite Dangerous ship build aimed at players in the middle game, who want to laser mine for profit or community goals but have not unlocked the Imperial Cutter or a fleet carrier.

Goals

Create a ship to:

  1. Laser mine Platinum, Painite and bulk community goal minerals in planetary rings for long periods.
  2. Be cheaper than and not require the Imperial rank unlock of the Imperial Cutter.
  3. Operate without a fleet carrier or nearby station.
  4. Avoid unlockable modules.

Build

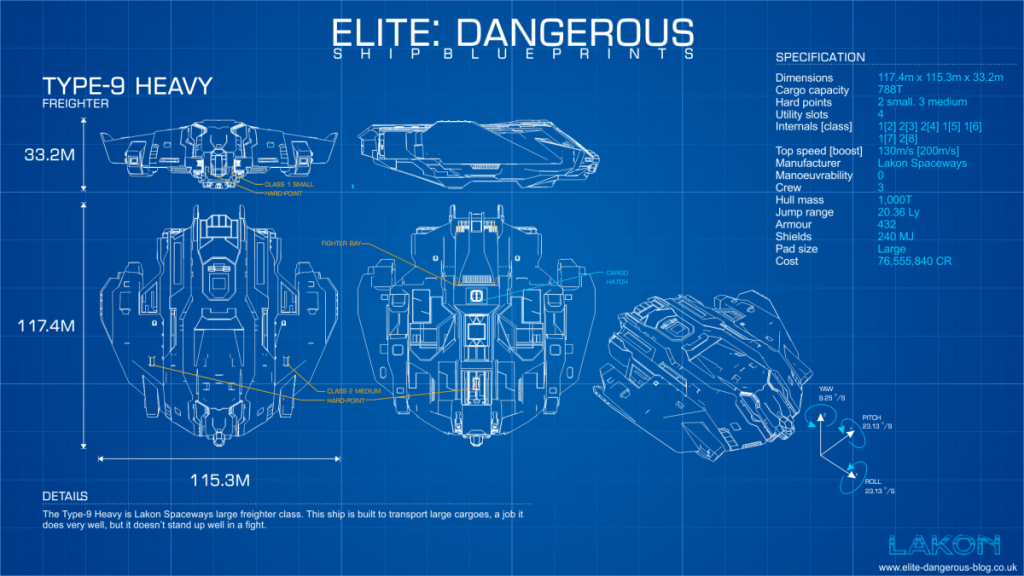
Type-9 Heavy Blueprint by CMDR-Arithon (https://swat-portal.com/forum/gallery/image/9473-type9/)

Links: EDSY and Coriolis (have your preferred one open as you read the guide for easy reference)

While a Type-9 Heavy is a cheap and effective bulk laser miner. However, it requires engineering to be usable, particularly on its Power Distributor, to avoid copious waiting for the weapon capacitor to recharge, and its Thrusters, to make moving from one asteroid to the next less painful.

A minor point, but the Type-9 Heavy’s open canopy gives a wonderful view of asteroid belts and Elite Dangerous‘s screenshot-worthy sunsets and sunrises.

The laser mining aspects of this build are similar to the Imperial Cutter and Python Mining builds I described previously.

Laser Mining:

  1. Fewer hardpoints and smaller Power Distributor: Most of the details for laser mining are identical to the Imperial Cutter build linked above. The fewer hardpoints and smaller Power Distributor means it will take longer to melt fragments off each asteroid.
  2. Wonderful size 7 slot: The size 7 slot provides wonderful opportunities. Ideally, this is either a 7A Collector Limpet Controller or a 7E Cargo Rack. Using the Lightweight blueprint on the Collector Limpet Controller reduces its weight by almost 100 T.
  3. Too many collector limpets: This build has slightly more concurrent active collector limpets than necessary, eleven when nine are required, but this helps offset the Type-9 Heavy’s poor handling.
  4. Slow and clumsy: The Type-9 Heavy is slow and hard to manoeuvre, even with engineered thrusters. Remember that its pitch and raw rates are identical, unlike most ships in Elite Dangerous, and its lateral and vertical thrusters are relatively strong.
  5. Refinery: A 2A Refinery is sufficient for most mining tasks, as you are usually looking for one or two minerals only.
  6. Fuel Scoop: Equipping a 4A Fuel Scoop allows this ship to reach remote mining spots or distant stations with the best prices. Its fully laden jump range is low but still more than sufficient to travel across the bubble or further. The Type-9 Heavy also has a large fuel tank, meaning it needs to refuel or fuel scoop rarely. If you jump frequently and do not mind weaker shields, consider swapping the Fuel Scoop and Shield Generator.

Defence:

  1. Shields and armour: The Type-9 Heavy is not known for heavy shields and armour. Its shields are there to give you time to jump out if pirates attack or prevent hull damage from asteroid impacts. Impact or “physics” damage is absolute so use the Heavy Duty blueprint on both the bulkheads and Shield Boosters and Reinforced with Lo-Draw on the Shield Generator. Use a Bi-Weave Shield Generator if you bump into asteroids frequently but, otherwise, a normal Shield Generator is fine. If you cannot fully engineer the Power Plant, remove or downgrade Shield Boosters.
  2. No additional weapons: This build leaves the Type-9 Heavy’s two small hardpoints empty. Its Power Distributor is not strong enough to mount additional mining lasers and a Type-9’s sluggishness means it is ineffective in combat against all but the lightest opponents.
  3. Point Defence: Equip one Point Defence in a utility mount on the lower side of the ship, closest to the cargo hatch. This will target hatch breaker limpets, preventing pirates from forcefully stealing your cargo. Disable this when mining with friends. Otherwise, it may target friendly limpets.

Variations

  1. Stronger defence: Consider a Prismatic Shield Generator and replacing a Shield Booster with a Chaff Launcher if operating in a pirate-heavy area or player interdictions are likely. Chaff then high-wake out when interdicted. However, the extra power demands of the Prismatic Shield will likely require an Overcharged Power Plant, which increases heat generation when fuel scooping or mining at a low power capacitor.

Tactics

  1. Run: Identical to the Imperial Cutter build discussed previously, but avoid Resource Extraction Sites and run from pirates.

Laser Mining Imperial Cutter Build

An Elite Dangerous ship build for end-game laser mining.

Goals

Create a ship to:

  1. Laser mine Platinum, Painite and bulk community goal minerals in planetary rings for long periods.
  2. Be fast and agile enough to escape pirates or manoeuvre around asteroids easily. Surviving in Low- or Medium-Intensity Resource Extraction sites is a bonus.
  3. Operate close to a fleet carrier or friendly station, and so does not require a fuel scoop.

Build

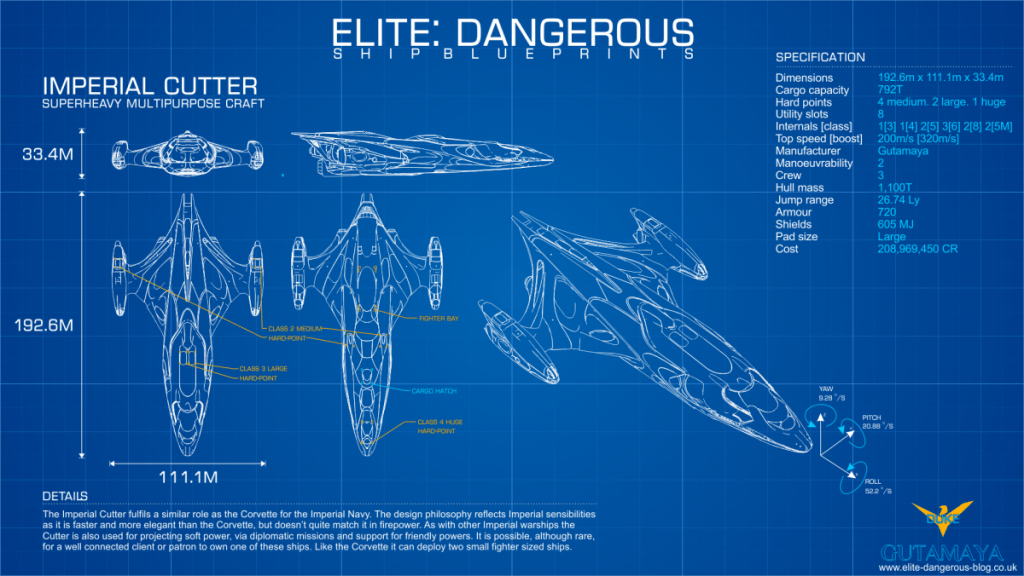
Imperial Cutter Blueprint by CMDR-Arithon (https://swat-portal.com/forum/gallery/image/9463-imperial-cutter/)

Links: EDSY and Coriolis (have your preferred one open as you read the guide for easy reference)

While a Type-9 Heavy is a cheap and effective bulk laser miner, the Imperial Cutter is faster, more agile, has a better Power Distributor and is in a different class regarding weapons, shields and armour. Unfortunately, the Imperial Cutter requires a mountainous rank unlock and comes with an eye-watering price tag.

Other contenders include the Federal Corvette, which has a better Power Distributor and better manoeuvrability but lacks the Imperial Cutter’s cargo space. The Anaconda is similarly light on cargo space.

The laser mining aspects of this build are similar to the Python Mining Build I described previously.

Laser Mining:

  1. Mining Lasers and Power Distributor: This build has four 2D Mining Lasers and uses a Weapon Focused blueprint on the Power Distributor. This means it can comfortably deplete an asteroid without exhausting its weapon capacitor. Equip the mining lasers in the top and bottom hardpoints and not the nacelle hardpoints to make mining smaller asteroids easier.
  2. Collector Limpet Controllers: Three collector limpets per 2D mining laser is a good guide for efficient fragment collection. A-rated Collector Limpet Controllers have a longer lifetime while B-rated have a longer range. A longer lifetime means fewer limpets are required. Most laser mining occurs at close range, so A-rated Collector Limpet Controllers are preferred. Use the Lightweight blueprint for a small boost to speed and agility.
  3. Prospector Limpet Controller: These tell you an asteroid’s composition and increase the number of fragments mining lasers can burn off. A-rated Prospector Limpet controllers provide more fragments than B-rated, B-rated more than C-rated and so on. Once again, use the Lightweight blueprint for a small boost to speed and agility.
  4. Avoid Mining Multi-Limpet Controllers: Multi-limpet controllers are great for multi-purpose builds or ships with constrained slots. However, dedicated limpet controllers are less effective for mining. Their lower rating means prospector limpets produce fewer fragments and their collector limpets have shorter lifetimes.
  5. Cargo space: Use the larger slots for Cargo Racks and the smaller slots for limpet controllers and a refinery. The 512 T cargo space should be ample. Fill it with between 25% to 75% capacity with limpets before heading out, with lower values if you are using a mining map or are otherwise familiar with the area.
  6. Refinery: A 4A Refinery is more than large enough for most mining tasks, particularly if you have to wait for the occasional “Refinery Full” bug to clear.
  7. Detailed Surface Scanner: A Detailed Surface Scanner probes rings for hotspots or to see hotspots revealed previously.

Defence:

  1. Shields and armour to taste: Mining does not require particularly strong shields. The eight utility slots coupled with a size six shield generator, the smallest an Imperial Cutter can practically fit, are overkill for mining. Impact or “physics” damage is absolute so resistances are not important. This build uses Bi-Weaves due to the lower power requirements and faster regeneration speeds when fighting in lower-intensity resource extraction zones.
  2. Military slots: Use Guardian Shield Reinforcement Packages to bolster shields. Hull and Module reinforcements are good substitutes if you have not unlocked those modules. The two military slots can be left empty if cost or mass are tight.
  3. Point Defence: Equip a Point Defence on the lower hull near the cargo hatch to protect against hatch breaker limpets. However, deactivate it if mining in a wing or with friends. Otherwise, it may target others’ collector and prospector limpets.
  4. Weapons to taste: The three remaining hardpoints can be left empty or filled with your preferred weapons. Medium Lasers and a Huge Multicannon are an effective pairing.

Variations

  1. Resource Extraction Site Mining: This build can handle itself against most pirates and in Low- and Medium-Intensity Resource Extraction zones. To improve the build’s effectiveness, consider replacing one of the 5A Collector Limpet Controllers with a fighter bay. Swap the sensors to Long Range A-rated Sensors to see what is coming. Wingmates are ideal. Flee if your shields drop.
  2. Fuel Scoop: If you want to operate without a carrier or in remote locations, swap one of the 5A Collector Limpet Controllers for a 5A Fuel Scoop.

Tactics

  1. Fire groups: Have one fire group for laser mining. Put the Prospector Limpet Controller on one button and both the Collector Limpet Controller and Mining Lasers on the other. Putting both collector limpets and mining lasers together means collector limpets are released when you fire the mining lasers.
  2. Laser Mining: Laser mining is covered by guides from elsewhere. To summarize, fly close to an asteroid then fire a prospector limpet at it. When it hits the asteroid, select the prospector limpet to see the asteroid’s composition in the info panel. If it contains sufficient minerals, move close to the asteroid near the pole of its rotation Fire mining lasers at it to melt off fragments, which the collector limpets will pick up. Open your cargo hatch for the limpets to drop the fragments into your refinery. When the asteroid is depleted, move to another asteroid and repeat. Ignore minerals you are not interested in. Abandon limpets in groups of 10 to 20 if your cargo racks are full.
  3. Pip management: Mining is best with four pips to weapons and two in engines. Unless you want to lazily boost into each asteroid instead of breaking, shields should only be needed for accidental bumps or pirates. Avoid boosting unless you are running from pirates or jumping out because an Imperial Cutter requires kilometers to slow down.
  4. Pirates: Waiting for the initial pirate to spawn, scan you and move on is the easiest plan. It may spawn outside sensor range so be patient. However, This build’s copious shields and huge hardpoint give the option of defeating most pirates if you are impatient.
  5. Resource Extraction Zones: Choose a resource extraction site within a hotspot if you want to mine a particular mineral. Start about 20 km away from the centre of the zone to avoid most of the traffic. Have the fighter deployed and set to “Defensive”.

Elite Dangerous Racing Builds: Eagles, Vipers, Couriers and More

This post outlines various Elite Dangerous ship builds for racing. Racing is an emergent gameplay loop in Elite Dangerous – there are no missions or similar activities requiring such a ship. However, many players create their own courses around settlements or canyons. The rules and location determine exactly what build you need so this post focuses on the fundamentals and design decisions.

Goals

The goals are:

  1. Build a ship for racing. This requires maximizing thruster speed and manoeuvrability. Like an exploration ship, this requires minimizing everything else down to the thruster’s minimum mass.
  2. Handle a few bumps. Racing along a course will often involve bumping into the sides or obstacles along the way. Strong shields or armour help survive a few of these.
  3. Assume that the ship can travel to the racing system via a fleet carrier or a shipyard on in-system station. Once the ship is outfitted and engineered, there is no need for a long jump range.

Build

Imperial Courier Blueprint by CMDR-Arithon (from https://swat-portal.com/forum/gallery/image/9483-imperial-courier/)

The table below lists racing builds for different ships, each designed to maximize their speed and agility:

NameSizeLinksMax Speed AT 2 pips/Boost
(m/s)
Boost Frequency (seconds)Pitch/Roll/Yaw
(degrees per second)
Comments
SidewinderSmallCoriolis EDSY373/7457.772/208/30Small core internals leaves lots of mass. A racing sidewinder needs to sacrifice little.
EagleSmalCoriolis EDSY489/8158.885/227/34The most manoeuvrable ship in Elite Dangerous.
Viper Mk IIISmallCoriolis EDSY606/9321162/170/28The fastest ship in Elite Dangerous.
Imperial EagleSmallCoriolis EDSY594/9321166/189/28Similar to the Viper Mk III in speed with slightly better manoeuvrability.
Imperial CourierSmallCoriolis EDSY582/8855.166/170/30A good compromise between speed and agility with frequent boosting, strong shields and strong armour.
Alliance ChieftainMediumCoriolis
EDSY
321/5575 (capped)59/152/27The most agile medium-sized ship, just pipping the Fer-de-Lance.
Fer-de-LanceMediumCoriolis
EDSY
405/5915 (capped)57/152/20A good compromise between speed and agility.
MambaMediumCoriolis EDSY524/6425 (capped)48/127/17The fastest medium-sized ship but has low manoeuvrability.
Imperial ClipperLargeCoriolis EDSY405/6425 (capped)59/135/30Very manoeuvrable for a large ship. Size 6 thrusters give a high minimum weight.
OrcaLargeCoriolis
EDSY
422/6425 (capped)38/92/30The fastest large-sized ship. However, its poor agility makes it unsuited for racing.
Imperial CutterLargeCoriolis
EDSY
304/5405 (capped)27/76/14Possibly good for a demolition derby but not much else.
Speed and Agility Comparison of Speed-Focused Builds

The Viper MK III is the fastest ship in the game at a maximum possible boost of 932 m/s. The Eagle is the most agile. They are bolded in the table above and, deservedly, get a lot of attention. The Imperial Eagle matches the Eagle’s boost speed but not the unboosted speed.

However, these Viper Mk III, Eagle and Imperial Eagle builds sacrifice just about everything else to attain those speeds. They have a minute jump range, heat problems, can boost infrequently and a modest bump will destroy them.

Getting these ships to engineers is also challenging. Using a fleet carrier to jump the ship to each engineer will be easier for those with patience. Otherwise, fitting a temporary Frame Shift Drive to jump to engineers is a good idea.

Heat is also a challenge. Grade 5 Overcharged on the Power Plant means the ship will often overheat when jumping, fuel scooping or boosting frequently. Use the lowest grade Overcharged on the Power Plant that you can get away with. Temporarily equipping more fuel tanks reduces the need to fuel scoop, too.

Instead, the Imperial Courier is a good compromise between speed and agility while sacrificing little. You can adjust the components to taste, like having a larger frame shift drive to get to engineers or racing tracks unaided or stronger shields. Heat management is also much better.

Outfitting and Engineering for Racing

  1. Thrusters and minimum mass: Thrusters in Elite Dangerous roughly follow a real-world physics model. They provide a certain amount of thrust that is divided by the ship’s mass to determine speed and agility. However, unlike frame shift drives, thrusters have a minimum mass, meaning reducing the ship’s mass below that value provides no benefit. Therefore, the design goal with a racing ship is to equip and engineer the best thrusters possible, reduce the mass as much as possible then add necessities and “nice to haves” until just below the minimum mass.
  2. Enhanced Performance Thrusters: Only available from engineers that provide thruster blueprints and only available in sizes 1 to 3, these thrusters provide the most thrust but have low minimum, optimal and maximum mass values.
  3. Lightest core internals: Fill every other core internal slot with the lightest component possible, usually the D-rated version of the lowest equipable class. Engineer Sensors and Life Support with Lightweight and everything else with the blueprints that do not increase mass and Stripped Down experimental effect. This means using Overcharged blueprint on the Power Plant and the Fast Boot blueprint on the Frameshift Drive. Lower engineering grades than 5 are viable for this build if materials are scarce or overheating is a problem with the Overcharged Power Plant.
  4. Power Distributor: The Power Distributor is the exception to minimizing core internals.. Using a larger Power Distributor reduces the time between boosts by a few seconds. Engine Focused or Charge Enhanced are both viable blueprints, although Charge Enhanced provides slightly faster recharge, meaning you can boost a tad more often. Charge Enhanced also helps with shield regeneration. Use the Super Conduits experimental effect instead of Stripped Down if you have the mass available.
  5. Fuel tank: If the mass is still too high, reduce the fuel tank size. While you do not have to completely fill your fuel tank, there is no easy way to vent fuel. Therefore, a smaller fuel talk is the easiest way to minimize fuel mass. This is normally a dangerous trade-off but acceptable for this build.
  6. Bump protection: You can apply the Heavy Duty blueprint and Deep Plating experimental effect to Lightweight Alloy without worrying about the mass multiplier. Lightweight Alloy has zero mass. A D-rated Shield Generator with the Enhanced, Lower Power blueprint and Stripped Down experimental effect gives reasonable protection at a negligible mass and power cost.
  7. Optional internals are optional: As long as you have sufficient power and they do not add mass, you can add whatever you want. A Fuel Scoop can help keep the small fuel tank topped up. An Advanced Docking Computer and Supercruise Assist are nice to have.
  8. Empty hardpoints and utility mounts: As with optional internals, nothing is required here. This build runs from fights and is well equipped to do so.

Variations

  1. Lots of tweaking: Expect to experiment with and adjust these builds a lot to match your play style and different racing tracks and environments.
  2. Too fast or fragile: These builds may be too quick or too brittle when hitting obstacles. Add Hull Reinforcement Package(s) to solve both problems.
  3. Mines and chaff launchers: Depending on the rules of your races, limited weapons may be equipped for a “Mario Kart”-style race. Mines and Proximity Mines are hazardous for those following you. Chaff can disorient those nearby or celebrate a win. Seeker Missiles can take out those ahead of you, assuming you can get a lock
  4. Wake scanning: Outside of racing, fit a 0D Wake Scanner and better sensors to make a ship for scanning wakes for encoded materials.
  5. Hit and Run: Make this into a hit-and-run ship, e.g. with torpedo tubes, but you are unlikely to destroy anything other than the lightest ships.
  6. Mosquito: Fit an FSD Interdictor then interdict pirates then stay out of their firing arc or boost away for a fun challenge.

Tactics

  1. Racing: Shift pips between engines and shields to control velocity and minimize the damage from hitting obstacles. Deploy the cargo scoop or landing gear temporarily for easier turns. Boost laterally to avoid or mitigate an impending collision or get around that tight corner.
  2. Practice: Racing is a skill. Without a course, the training simulations available under “Training” on the main menu can help.
  3. The thrill of speed: Casually boosting to 800+ m/s low over a planet’s surface or around a settlement is fun. This ship may also be effective a Buckyball racing (flying over a planet with flight assist off to find the fastest possible speed).
  4. Combat: If you are attacked, clearly racing ships are well equipped to escape.

Beginner Diamondback Explorer (DBX) Exploration Build

An Elite Dangerous ship build for beginner players.

Goals

The goals are:

  1. Build a ship for exploring. Exploration requires a long jump range to reach distant star systems, a Fuel Scoop for refuelling, a Detailed Surface Scanner (DSS) to map planets and a Planetary Vehicle Hangar to house a Surface Reconnaissance Vehicle (SRV).
  2. The build must be accessible to early-game commanders. It should be cheap and require no engineering, rank, reputation or unlockable ships or modules.

Exploring can easily and quickly earn millions of credits, a huge boost early in the game. While not action-oriented like combat or as lucrative as trade, exploration has the lowest barrier of entry of all the main game loops. It appeals to those looking for a relaxed, self-paced playstyle motivated by seeing and discovering new things. It also gets the player out of their comfort zone by travelling long distances.

Build

Diamondback Explorer Blueprint by CMDR-Arithon (https://swat-portal.com/forum/gallery/image/9458-diamondback-explorer/)

Links: EDSY and Coriolis (have your preferred one open as you read the guide for easy reference)

The Diamondback Explorer is the cheapest of the four best exploration ships, the others being the Anaconda, Krait Phantom and Asp Explorer. 

This build can jump around 37 LY. While jump range is not the only indicator of a good exploration build, it helps. Unlike similar games, exploring in Elite Dangerous requires travelling long distances. Fewer jumps mean reaching the destination sooner.

If the just over 10 million credit cost is too high, B-rate the Frame Shift Drive and Fuel Scoop. This change halves the cost but significantly reduces the jump range. Upgrade as soon as you can afford to do so.

Finding a station that sells everything can be a challenge. Early- to mid-game players will not have access to Jameson Memorial station in Shinrarta Dezhra. Thankfully, both EDSY and Coriolis link to EDDB, locating nearby stations selling this build’s ship and modules. 

Exploration:

  1. Frame Shift Drive: The 5A Frame Shift Drive grants the longest jump range possible. Once you can, add the Increased Range blueprint and Mass Manager experimental effect. Even a grade one will have a marked improvement. The double engineered version from a human technology broker is even better but requires harder to find materials. The Fuel Scoop means you can keep jumping as long as scoopable stars are within range.
  2. Lightest core internals: The rest of the core internals are as light as possible (D-rated) or even lower classes. This decision has little noticeable effect except for only boosting every 28 seconds.
  3. Exploration essentials: A Detailed Surface Scanner (DSS) maps planets for credits, identifies points of interest and creates the geological/biological heatmap. A Planetary Vehicle Hanger facilitates surface activities like material gathering.
  4. Empty optional internals: This build intentionally leaves several optional slots empty. They are not needed and can add weight. 
  5. Empty hardpoints and utility mounts: As with optional internals, this build runs from fights.
  6. Artemis suit for exobiology: Not technically part of the build, but grab an Artemis suit before setting out. Exobiology is a great excuse to get out of your ship, earn a few extra credits and watch the sunrise on alien worlds. 

Variations

  1. Longer exploration trips: Add a Heat Sink Launcher to minimize heat damage when caught in a star’s exclusion zone. Advanced Field Maintenance Units (AFMU) can repair module damage caused by heat or Frame Shift Drive damage caused by fuel scooping neutron stars or white dwarfs. Two AFMUs mean they can fix each other if needed.
  2. Rare commodity hauler: Fill the empty slots with cargo racks. This change turns this build into a passable long-distance hauler, suitable for rare commodities. The selling price of rare commodities increases the further you sell them from their point of sale. It can also help with long-distance cargo hauling for community goals.
  3. Rescue ship: Add a Rescue Multi Limpet Controller and a Cargo Rack for limpets. This variant can refuel or repair other commanders.

Tactics

  1. Initial exploration: If the goal is to learn exploration mechanics or early cash, find high population systems in the bubble and map earthlike words and anything terraformable using the DSS. While many systems’ bodies are already in the navigation computer, no bodies are pre-mapped. You can earn over a million credits per mapped earthlike world.
  2. Seeing the sights: Elite Dangerous’s galaxy has many natural wonders. For example, visit a nearby black hole, like at Maia. Travel to the nearest neutron star, Jackson’s Lighthouse, then neutron jump back. Visit the famed red giant Beetlegeuse and fuel scoop outside the orbit of the innermost planet. The codex has many suggestions.
  3. Find the lore: Elite Dangerous has lots of lore but finding it requires effort. Abandoned settlements, ghost megaships and tourist beacons are plentiful. EDDB (https://eddb.io/attraction) has an easily searchable list.
  4. Exploration rank and credits: Following lists of high-value star systems can quickly earn exploration rank and credits. These include the Alpha Orbital “Road to Riches” (https://www.alpha-orbital.com/pathfinder) and Spansh (https://spansh.co.uk/riches).
  5. Engineer unlocks: Travelling long distances away from your starting location unlocks some engineers. Elvira Martuuk requires 300 LY and Professor Palin requires 5000 LY. An exploration build such as this is ideal for such long trips. 

Beginner PvE Combat Vulture Build

An Elite Dangerous ship build for beginner players. See PvE Combat Vulture Build for an end-game version.

Goals

The goals are:

  1. Create a build that excels at early PvE combat, such as Low- and Medium-Intensity Resource Extraction Sites and Low-Intensity Conflict Zones.
  2. The build must be accessible to early-game commanders. It should be cheap and require no engineering, rank, reputation or unlockable ships or modules.

Build

Vulture Blueprint by CMDR-Arithon (https://swat-portal.com/forum/gallery/image/9464-vulture/)

Links: EDSY and Coriolis (have your preferred one open as you read the guide for easy reference)

When only considering combat, the Vulture is a giant among small ships. An unengineered Vulture is faster, more agile, has better shields, harder and thicker armour and more firepower than any other similarly outfitted and unengineered small ship, including the Viper Mk III. 

Unfortunately, this build costs around 20 million credits. This cost might seem high for a beginner build. You can outfit a combat Viper Mk III for 2.5 million credits, a figure much easier to attain for an early-game player. This Vulture build’s rebuy is also high at about 1 million credits. 

However, you want the best odds when you are new to combat. A Viper Mk III will struggle against all but the weakest enemies. Its smaller hardpoints have lower Armour Piercing. It has fewer utility points, so you have to sacrifice shield boosters for chaff.

You also want to be established enough to afford rebuys. The Viper mentioned above is cheap but, at that stage, a new commander may not have the experience or ships to quickly earn it back. In this build, you can earn the Vulture’s rebuy cost in under an hour of fighting in a Low-Intensity Resource Extraction Zone.

If cost is a limiting factor, B-rating the Frame Shift Drive, Thrusters and Power Distributor saves 5 million credits. You can sell the B-rated modules with no loss and upgrade when you have the credits.

Finding a station that sells everything can be a challenge. Early- to mid-game players will not have access to Jameson Memorial station in Shinrarta Dezhra. Thankfully, both EDSY and Coriolis can locate nearby stations selling this build’s ship and modules in Inara. 

This build is far from original. Unengineered Vulture builds go as far back as 2015. However, the discussion below should help new pilots understand why this build works and useful variations.

Offence:

  1. Gimballed weapons: Gimballed weapons auto-aim, but chaff confuses them. They are a good compromise between the more difficult aiming with fixed weapons versus the lower damage output of turreted weapons.
  2. Burst Lasers: Burst Lasers compromise between the low power, damage and heat Pulse Lasers and the high power, damage and heat beam lasers. They do not require ammunition, so you can focus on flying and combat instead of watching ammunition counts. 
  3. Heat management: With four pips to weapons, these Burst Lasers can fire for 18 seconds. This time is usually more than long enough for the enemy to pass by. The weapons’ heat build-up is slow, making them quite forgiving. It is difficult to self-inflict heat damage with this build.
  4. FSD Interdictor: An FSD Interdictor is useful for interdicting assassination mission targets, wanted ships for bounty vouchers or even powerplay ships for merits.
  5. Kill Warrant Scanner: A Kill Warrant Scanner gives about 25% bonus credits for each kill. It generates additional, needed cash early on. Assign it to the same fire group as your Burst Lasers. The scan takes ten seconds, and the range of the 0E version is only 2000 m. However, this build fights best when up close, so that range is acceptable.

Defence:

  1. Power management: The biggest challenge with outfitting a Vulture is its small Power Plant. It is a class too low given the power demands of its other modules. Without the Overcharged engineering blueprint, you need to make tradeoffs with your outfitting. This build moves the Frame Shift Drive and Cargo Hatch to a low power priority. They are unpowered when deploying hardpoints, meaning you have to stow them before scooping engineering materials or jumping out. The Fast Boot engineering blueprint on the Frame Shift Drive would also help with fast get-a-ways.
  2. Shields: Bi-weave shields are generally weak when unengineered. However, they are sufficient given this build’s power constraints and the likely weak enemies. Two D-rated shield boosters give the best shield increase considering the remaining available power.
  3. Chaff: A Chaff Launcher is the best choice for the remaining utility slot. It requires minimal power and works against all gimballed weapons. 

Variations

  1. Laser and Multi-cannons: Burst Lasers are sufficient for weaker enemies. However, Expert and better NPC pilots have noticeably better armour. This build’s pure thermal damage from lasers is less effective against them. Replace one Burst Laser with a 3C Multi-Cannon to swap some thermal for kinetic damage. Keep everything on the same fire button for simplicity or use separate fire buttons to micromanage ammunition.
  2. Fixed weapons: If you back your flying skills, replace the gimballed weapons with fixed versions. It can be frustrating at first, particularly against smaller or agile craft, but you will improve with practice.
  3. More hull: Replace the FSD Interdictor with a 1D Hull Reinforcement Package if you do not plan to use it. However, it is worth experimenting on a few wanted targets at supercruise, if not just to familiarise yourself with how interdictors work.
  4. Fighting without life support: Equip a 3A Life Support, then give it a low power priority. Deploying hardpoints means fighting without oxygen. However, A-rated life support gives you 25 minutes of oxygen, which is more than long enough for an engagement. It means you have more power for better Shield Boosters or whatever you prefer. This change is an interesting take on power management, but I find no life support’s altered soundscape distracting.

Solo Tactics

  1. Finding targets: The short sensor range required more flying around to locate targets than builds with better sensors. Look for telltale distant laser fire or explosions or follow system authority ships. Scan potential targets first to ensure you only fire on wanted ships.
  2. Point and shoot: Flying this build is pretty basic. Speed up to get close to the target, throttle down to 50% when they get within one km, and then fire. Pulse lasers are most effective within 800 m. Turn as they fly past, then repeat the process. Experiment with thrusters and pre-turning to increase time on target.
  3. Power (pip) management: This build works fine with the default two pips in every category. However, it comes alive when you actively manage your pips, moving points into what you need at the time.
  4. Shield management: Start every fight with shields at 50% or better integrity. Put four pips in systems to maximize the shield protection and rebuild/regeneration rate between fights or when not firing. Putting pips in systems is faster than doing a reboot/repair when shields are down for this build.
  5. Chaffing: Chaff when shields get low, multiple targets engage you, or you need to escape. 
  6. Fun: Once I reset my expectations for an unengineered ship, I found flying this Vulture surprisingly fun. It can almost continually kill Novice-piloted or easier ships. The multi-cannon variant can take down wings of Expert- or Master-piloted NPC ships without too much hassle.
  7. Upgrade path: Consider the Alliance Chieftain or, reputation willing, the Federal Assault Ship or Imperial Clipper as the logical next step in combat ships. See PvE Combat Vulture Build for an end-game version of this build.

Team or Wing Tactics

  1. Unchanged: Fly in a wing or team as you would in solo. Whether you tank depends on your teammate’s ships and builds.